
WebMapper allows you to create 'clickable' WWW page images, with hot spots,
each of which takes you to a different place. Instead of having a separate
image for each link, you can have one image, with each area of the image
taking you somewhere new.
WebMapper can be loaded in the usual way by double clicking on the program's
icon in a filer window. Once loaded, you can activate the program in several
ways:
From left to right across the top of the toolbar, the buttons do the following:
The first two buttons allow you to choose whether the software creates
HTML code for client-side imagemaps - handled by the web browser (left
hand icon), or the more compatible, but more difficult to test, server-side
map datafiles.
The next button allows you to save your completed map to disc.
The dustbin icon provides you with a quick way of removing a selected area
if it isn't what you wanted.
Zoom - the magnifying glass button - provides a quick method of scaling
your image up and down. Left click to zoom in, and right click to zoom out.
Select mode, allows you to select a previously created area, and
move it around by dragging it in the image window. The selection menu on
the main menu will also be activated, allowing you to alter or delete the
area.
Rectangular Area Creation mode, marks a rectangular area of the image as
being a hot spot. Click once at the top left of the area, and again
at the bottom right, and the area will be created. You will be prompted to
enter the web address of the page you want the area to link to. You can
also discard the area if it isn't to your satisfaction.
Circular Area Creation mode is similar to the rectangular
variant, but simply creates a circular area. Click once at the centre of your
circle, then again at a point on the circumference. A guide circle will
appear once you've made the first click. Once created, you can link your
area as for rectangles.
Polygonal Area Creation mode - the final icon - provides the third
type of area which you can create in your map. Polygonal areas should be used
to define irregular areas for which the previous two area types aren't sufficient.
Click once at each corner of the polygon, and right click to fix the shape to
finish.
To create a hot area on your image, first enter either the rectangular,
circular or polygonal creation mode by clicking on the appropriate button on the
toolbar. Next, click once on the image to start creating the area, and move the
mouse. You will notice that a guide area moves with the pointer. A further
click will finish circles or rectangles, but will add another corner to a
polygon - right click to finish one of these.
Once you created the area a window will open allowing you to enter the web
address of the page you wish the area to link to. Don't worry if you get this
wrong as you can change it later. If the area itself is not to your
satisfaction, you can discard the area altogther by clicking on the appropriate
button in the web address window.
That's it! You've created a 'hot' area. You can now add more, or set the
default URL for the rest of the image, then save your work as a map file.
To move an area around the image, simply enter Select mode by clicking on the
pointer button on the toolbar, then, pointing to the area you wish to move,
simply drag it with the left button held down until the desired new location
is reached.

Most of the menu options are self expanatory, with only the selection menu and
default URL needing explanation.
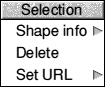
The Shape Info window is available off the Selection sub-menu, and provides details
on the type of area, its co-ordinates and the address of the page it links to.
This window is provided for reference only.
The Delete option allows you to remove an area from the list of hot spots. Note
that this doesn't affect your original image!
To alter the address of the WWW page which the area links to, use the window off
the Set URL option on the Selection sub-menu. You will see the selected area's
current target, and you can alter this to suit
The most common type of server-side map format is NCSA, and for most users this
default will be fine, as it is used by most of the commercial WWW and internt
providers (ISPs). This includes most free space offers to users of the big ISPs.
However, a small amount of servers use the so-called CERN format, and this
includes some of the educationally orientated ISPs, so you may find that you
have to change from the default. Note that there is only one format for client-side
maps.
To change the format created by WebMapper, click on the Choices option on WebMapper's
icon bar menu. You can choose whether CERN format is used, and whether the program
defaults to client or server side maps. Once you've chosen what you want, simply
click on OK, or save your settings as the default ones. When you save your server
side map next time, it will be in the format you selected.
The only way to test an image map is to actually put the web page and map onto
an Internet WWW server. However, you can check to see if the image is 'active'
by loading it into a WWW browser which displays the target URL as you move the
pointer over the WWW page. The active image should give the co-ordinates of the
pointer relative to its top left corner.
Note that the active image in the WWW page needs the ISMAP parameter in addition
to the usual <IMG SRC=""> tag - ie. <IMG SRC=""
ISMAP > . Alternatively, HTMLEdit 2 users can simply tick the image map button!
You also need to set up the hypertext link for the map file. This is VERY strange,
so watch carefully!
You should save the client-side HTML codes out of WebMapper and insert them into the
HTML page on which the image is displayed. You must give the map a name - either fill
this in later (see tag below), or type it into the client-side save box in WebMapper
when saving.